Setting up Your Custom Domain on Magic Pages
Learn how to easily set up a custom domain for your Ghost CMS on Magic Pages. Follow our clear, step-by-step guide to update DNS settings and enhance email deliverability.
 Jannis Fedoruk-Betschki
Setting up or changing a custom domain for your Ghost CMS website on Magic Pages is a simple and straightforward process. While the ".mymagic.page" subdomains are great, using a custom domain gives your website a more professional feel. This guide covers both setting up your domain for the first time and changing it later on.
- Log into Your Ghost CMS Website: Navigate to
yoursite.mymagic.page/ghost(or your current domain) and log into your admin panel. In the left navigation panel, go to the "Customer Portal". - Access the Domain Settings: Click on the "Domain" tab. Select "Set up Domain" to enter your custom domain or "Change domain" if you already have one.
- Enter Your Custom Domain: Make sure you have already registered the domain you want to use. Enter the domain name you wish to use and click "Continue". Unless you're on a provider like Cloudflare that supports CNAME flattening, use the
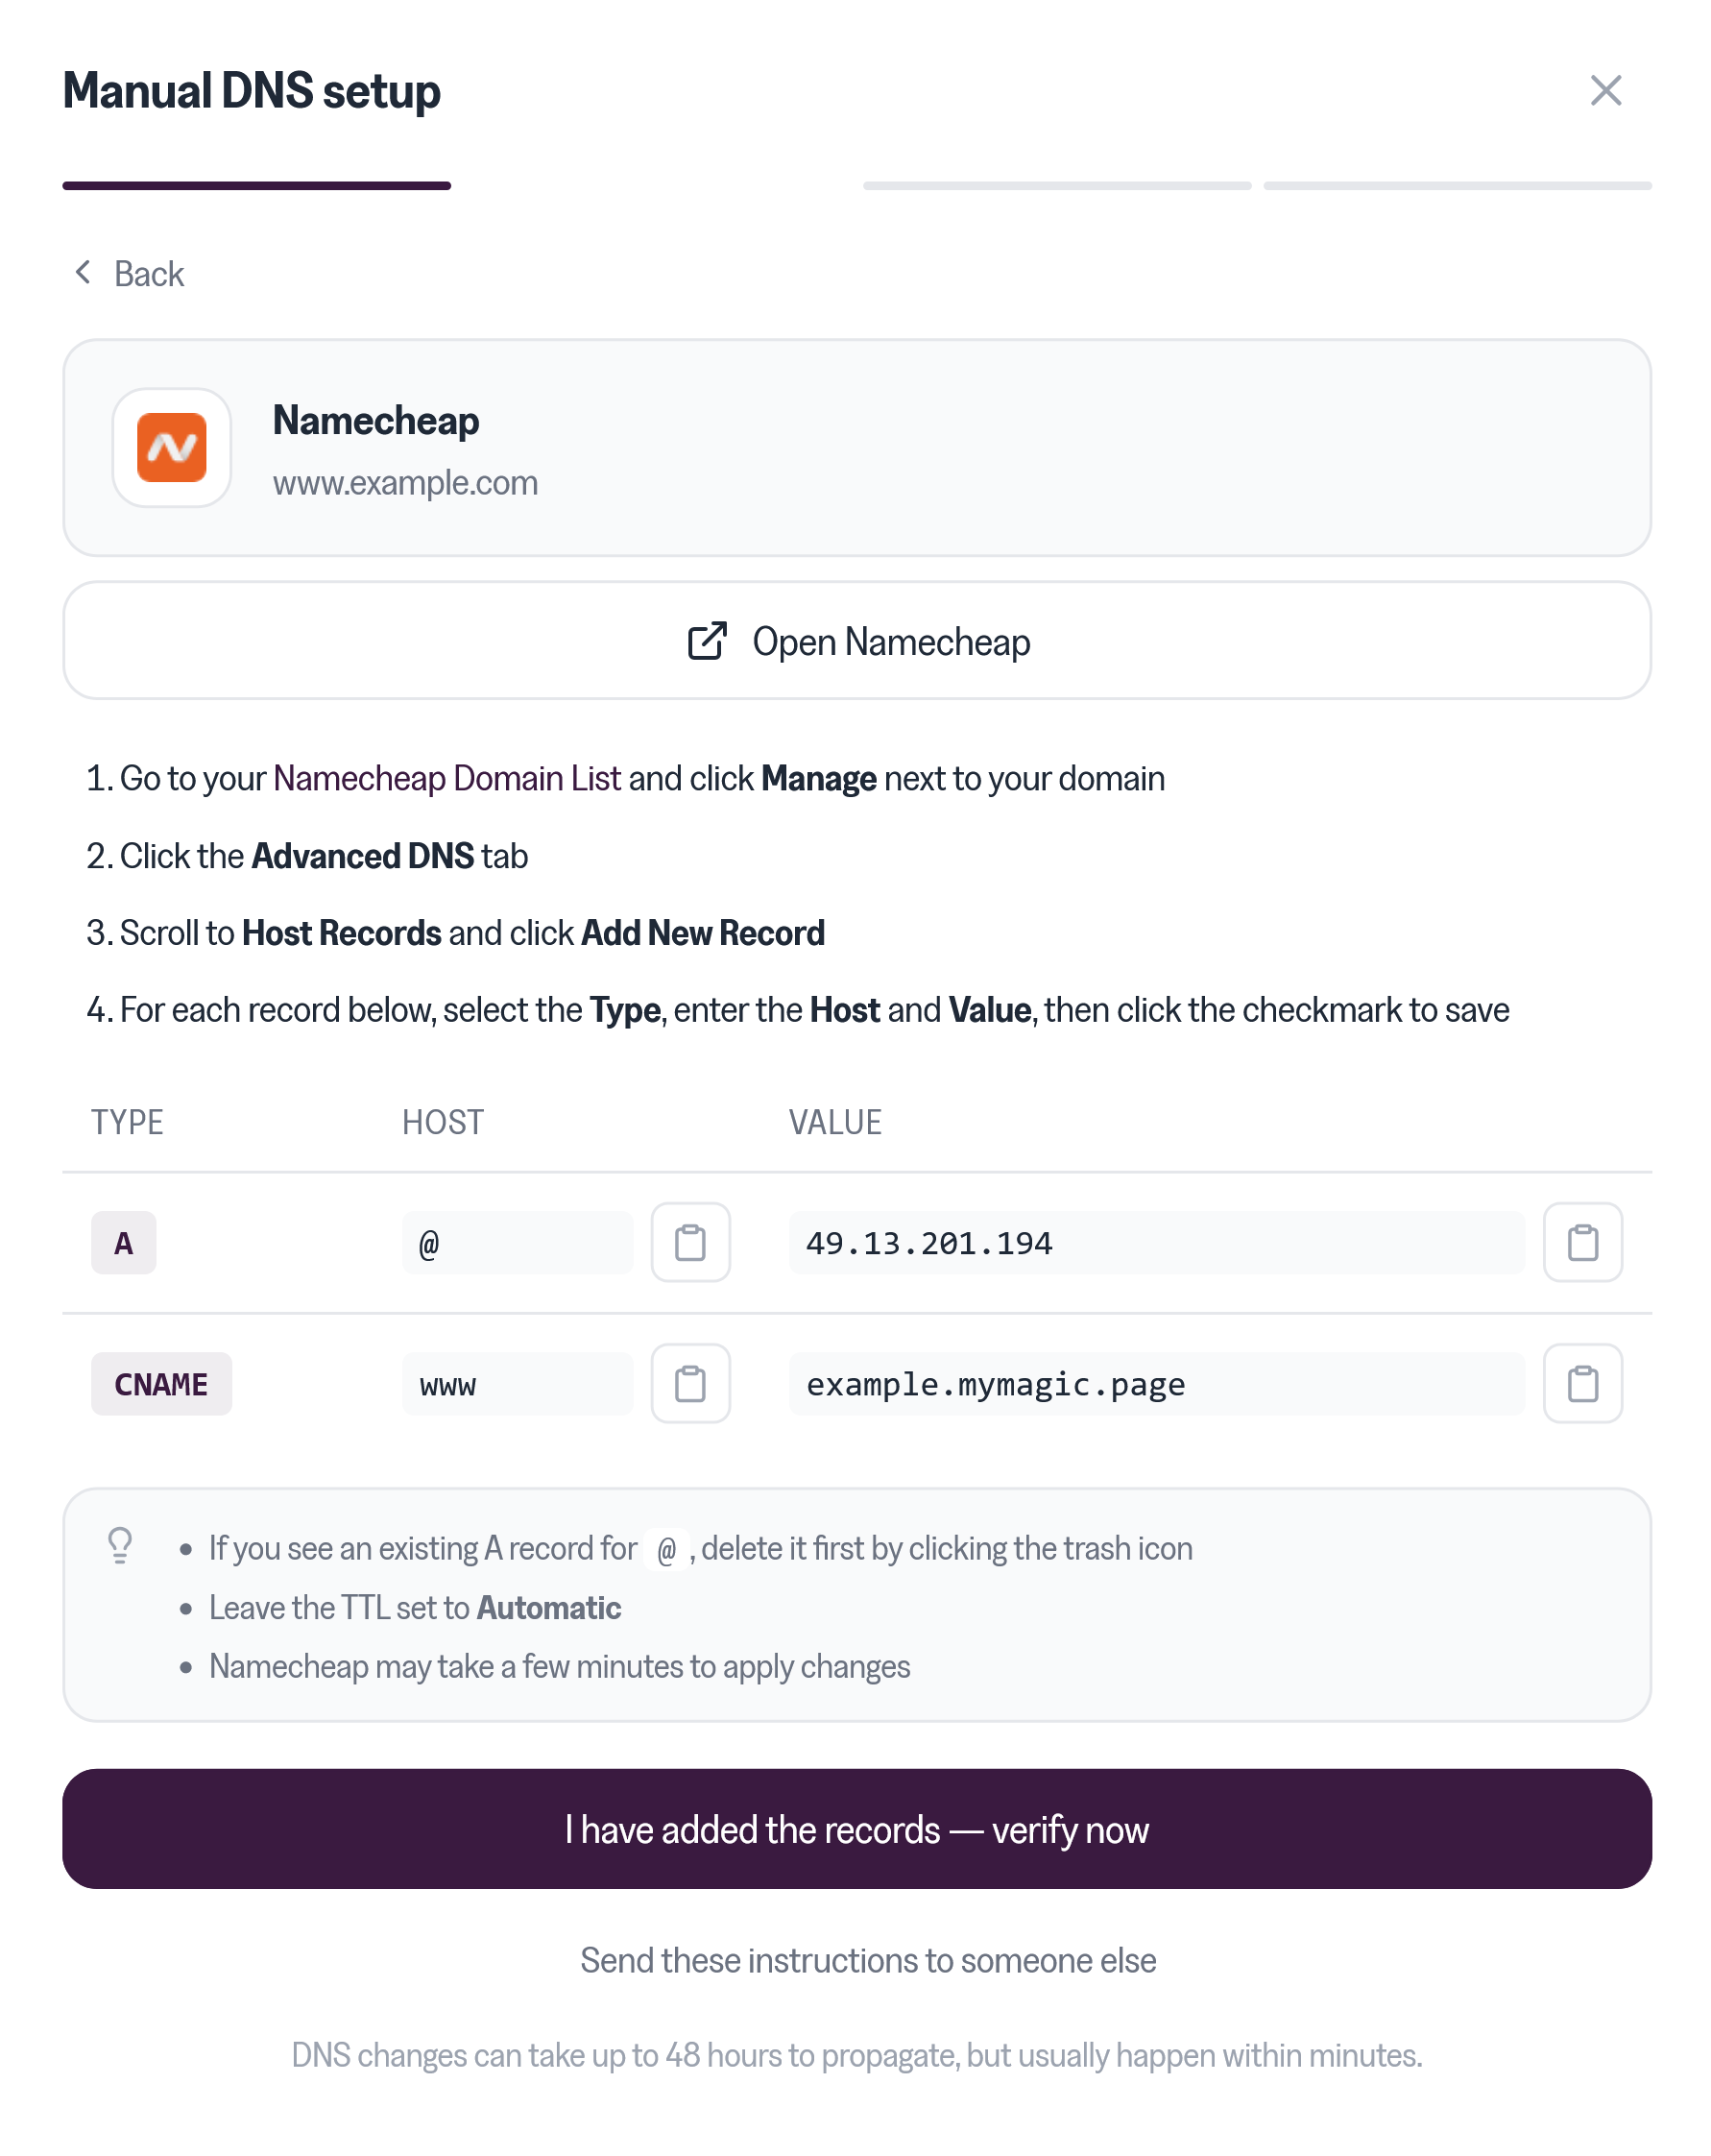
wwwversion for your domain (e.g.,www.newdomain.com). - Update Your DNS Records: The DNS setup widget will automatically detect your DNS provider show the exact record(s) you need to add. You can click on Open [your provider] button to jump straight to their dashboard. Add the records exactly as shown. DNS changes can take up to 48 hours to propagate, though they're often live within minutes.
- Activate Your Domain: Once you've added the DNS records at your provider, return to the Magic Pages customer portal and click "I have added the records — verify now". This initiates the verification process for the new domain. Magic Pages will verify the DNS settings and configure your Ghost website to use the new domain once propagation is complete.
To send newsletters reliably from your new custom domain, you must verify the domain for email sending. Navigate to the Newsletter tab after activation and follow the instructions to add the required DNS records. You can find a step-by-step guide for connecting a custom sending domain here.
Important Notes
- Changing Domains: The process for changing an existing custom domain is the same as setting one up initially: update the domain in the portal (Step 3), update DNS records at your provider with the new values provided (Step 4), activate (Step 5), and crucially, re-verify your domain for email sending (Step 6).
- Root Domains: Not all DNS providers support CNAME records for the root domain (e.g.,
newdomain.comwithoutwww). If your provider does not, consider using services like Cloudflare for more control or using thewwwversion (e.g.,www.newdomain.com). .mymagic.pageSubdomain: Your original.mymagic.pagesubdomain remains active as an internal identifier, but traffic will primarily route through your active custom domain once set up.
More in this section

Didn't find your answer?
Ask us anything — a real person reads every message, usually the same day.
